

In today’s web 2.0 many business websites utilize JavaScript to protect their content from web scraping or any other undesired bot visits. In this article we share with you the theory and practical fulfillment of how to scrape js-dependent/js-protected websites.
Table of contents
I. Prerequisites
II. Objective
III. Introduction
IV. Getting Started
V. Making a TripAdvisor Scraper
- 1. Launching Chrome
- 2. Visiting TripAdvisor
- 3. Clicking an element in Puppeteer
- 4. Locating Sign In btn
- 5. Locate Continue & Email btn
- 6. Reading authentication details
- 7. Writing to an Input Field
- 8. Filling authentication details
- 9. Check for [Re]Captcha
- 10. Locate Hotels link
- 11. Exiting Chrome
- 12. Saving hotels
- 13. Finishing up
VI. Running the Scraper
VII. Numerical Results
I. Prerequisites
Basic understanding of HTML, CSS, and Javascript (also Node.js). You should be familiar with the ES6 Javascript syntax below
- array and object destructuring
- rest/spread operators
- string literals
- async/await
- Promise
II. Objective
At the end of this article, you will be able to scrape any kind of JS-driven website with great speed while you avoid limitations.
III. Introduction
- General Introduction
As in 2017, about 94.5% of websites use Javascript and 35% of them require it. Even though web developers provide fallback to browsers that do not support Javascript, most websites today will not function unless Javascript is supported by the browser
- Essential Difference Between Static Websites and JS-rendered ones
Web scraping started off with making network requests to the server and parsing the returned html markup to get the required data. There are a lot of modules/libraries used in making requests, and we have the ones we use in parsing the returned html markup to get the data we want from a document.
A popular Node.js module for making HTTP requests is request-promise and a common module for parsing HTML markup is cheerio. With cheerio, you are able to use jQuery syntax to extract the data you want from an HTML document.
This style of scraping websites is straight-forward, direct, fast and very performant. But a web scraping professional will not rely on this style of making web scrapers because it is close to being archaic as a lot of websites today return a very minimal HTML markup so that the data you intend to extract are not in the markup.
If you visit the same website with a Javascript-enabled web browser, the data is present. This is due to the fact that the data you want are being rendered with Javascript while the web scraper one makes cannot execute Javascript code. This article guides you through how to start building web crawlers that are able to execute Javascript code and expose an updated Document Object Model which contains data you want.
As a web bot developer, you need to up your game by learning to scrape Javascript-dependent websites effortlessly. Luckily, this guide teaches you all you need to be able to scrape any kind of website.
IV. Getting Started
- Make sure Node.js and NPM are installed
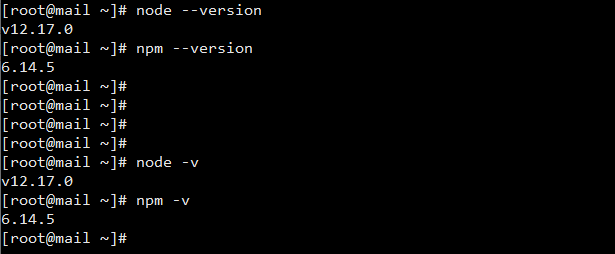
First check if your Node is installed by running node –version (shortcut: node -v) on the terminal (also called shell or command line but for the purpose of simplicity, let’s stick to terminal throughout this article), and that npm (node package manager) is also installed by running npm –version (shortcut: npm -v). The two should output the current version of Node and npm you are running as shown below:
unless Node is not well installed on your version where you will now have to install it. Make sure you are running Node.js v12 or a later version. It is recommended to be running a stable release.
- Create a folder and set it up for your web scraping project
A good practice is to have a folder where all your web scraping projects are stored and you should name each folder the name of the project or rather follow a naming convention for your projects. The first step is to create a folder and navigate to it on the command line (also called terminal or shell). The folder I created for this project is js-dependent-scrape.
Then run npm init in your project directory and you will have an interactive screen waiting for your inputs like below: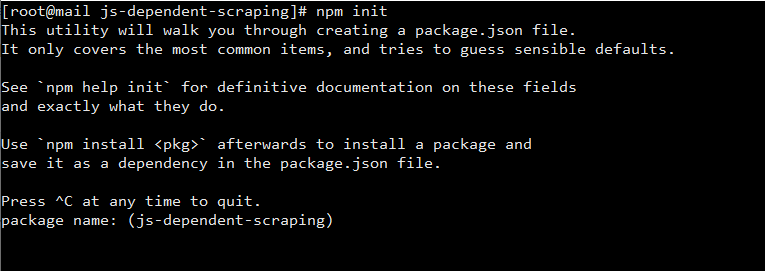
As you can see, the package name is having js-dependent-scraping in brackets, which is the name of the folder I ran npm init in. If your project name is the same as the folder name just hit the Enter/Return key and your folder name is used as the package name, otherwise enter the name you would like to name your project before you hit enter.
Provide the necessary inputs for which you are asked, noting that the ones in brackets are the default and hitting the Enter key auto-fills in the default. And if there are any you are unsure of just hit the Enter key to continue.
When done, you will be shown a JSON containing your entries, and you will be asked if the value is okay, with yes in brackets as the default. You can hit Enter if it is okay or type no if otherwise and redo it. You should then have a screen similar to:
You will then have a package.json file created in your directory.
- Open your project in a IDE
IDEs come with cool features and add-ons that make writing your codes very easy. Popular IDEs include VS Code, Net Beans, Android Studio, Eclipse, Sublime etc. But I will be using VS Code in this article. Whatever IDE you use, learn how to use it well, and if you do not already have one, download VS Code for your Operating System, install, and start using it. - Create necessary files
A good practice for developers to follow is having in their project folder:
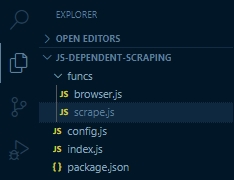
- an index.js file which is the entry point
- a config.json file in which all criteria and configuration settings are saved and can be read from. It is good to have only one source of data so that they can be easily edited
- a folder named funcs having two files – browser.js and scrape.js
Such that the project directory looks like:
- Install Puppeteer
Puppeteer is a Node.js library that provides us with an interface to drive a web browser in a way that the browser executes all in-page JS Code, fires necessary JS events and all the other things a browser does. This in turn makes the server believe it is a real user accessing their resources and allows full-access to our script.
Puppeteer is to run Chromium or Firefox in headless and non-headless modes. But as web bot developers, we run in headless mode almost all the time, the only time we run in non-headless mode is when we are debugging or just curious as non-headless makes us have visuals and see what our script is doing. You should always return to headless mode when done.
To install puppeteer version 2.1.1, run npm install –save puppeteer@2.1.1 (shortcut: npm i -S puppeteer@2.1.1 ) from the terminal in your project directory, and allow it run completely; it will. We have chosen puppeteer 2.1.1 because of its support for keeping application data.
1. Launching a Headless Browser
We will be creating a function in the funcs/browser.js file, one launches a browser in headless mode and opens new pages. We will then export these functions so that other files can access it.
A simple function to launch the browser is:
const launchChrome = async () => {
  const puppeteer = require("puppeteer");

  const args = [
    "--disable-dev-shm-usage",
    "--no-sandbox",
    "--disable-setuid-sandbox",
    "--disable-accelerated-2d-canvas",
    "--disable-gpu",
    "--lang=en-US,en"
  ];  let chrome;
  try {
    chrome = await puppeteer.launch({
      headless: true, // run in headless mode
      devtools: false, // disable dev tools
      ignoreHTTPSErrors: true, // ignore https error
      args,
      ignoreDefaultArgs: ["--disable-extensions"],
    });
    return chrome;
  } catch(e) {
    console.error("Unable to launch chrome", e);
    return false;
  }
};
All the above does is launch Chrome, we need to create 2 functions inside this function such that our function returns an array of the 2 functions. The first function creates a new page and the second function exits the launched browser.
The newPage function:
const newPage = async () => {
  try {
    const page = await chrome.newPage();
    const closePage = async () => {
      if (!page) return;
      try {
        await page.close();
      } catch(e) {}
    }
    return [page, closePage];
  } catch(e) {
    console.error("Unable to create a new page");
    return [];
  }
};
exitChrome function:
const exitChrome = async () => {
  if (!chrome) return;
  try {
    await chrome.close();
  } catch(e) {}
}
So, the funcs/browser.js file looks like:
const launchChrome = async () => {
  const puppeteer = require("puppeteer");

  const args = [
    "--disable-dev-shm-usage",
    "--no-sandbox",
    "--disable-setuid-sandbox",
    "--disable-accelerated-2d-canvas",
    "--disable-gpu",
    "--lang=en-US,en"
  ];  let chrome;
  try {
    chrome = await puppeteer.launch({
      headless: true, // run in headless mode
      devtools: false, // disable dev tools
      ignoreHTTPSErrors: true, // ignore https error
      args,
      ignoreDefaultArgs: ["--disable-extensions"],
     });
  } catch(e) {
    console.error("Unable to launch chrome", e);
    // return two functions to silent errors
    return [() => {}, () => {}];
  }

  const exitChrome = async () => {
    if (!chrome) return;
    try {
      await chrome.close();
    } catch(e) {}
  }

  const newPage = async () => {
    try {
      const page = await chrome.newPage();
      const closePage = async () => {
        if (!page) return;
        try {
          await page.close();
        } catch(e) {}
      }
      return [page, closePage];
    } catch(e) {
      console.error("Unable to create a new page");
      return [];
    }
  };

  return [newPage, exitChrome];
};

module.exports = { launchChrome };In the future, not using try … catch will be deprecated in Javascript.
Puppeteer is well able to launch headless Chrome browser, it being a good automation alternative to Selenium. It works to launch Chrome also with command line arguments customizing a Chrome instance. All the arguments/switches one may see here.
V. Making a TripAdvisor Scraper
A very good way to learn to scrape Javascript-dependent websites is to work on scraping a real Javascript-dependent website. This is why we have decided to walk you through making a web crawler that signs in to TripAdvisor with the login details you will provide and then scrapes the names, prices, and ratings & reviews of Hotels in London.
We will have to think of how we want our crawler to scrape London Hotels after logging in to TripAdvisor with the details we provide it. We will break down our thought process into smaller ones, this is our flow in creating the web bot.
After manually visiting TripAdvisor and trying to look up a few London Hotels, here is an sample workflow one could come up with:
- Launch Chrome and open a new tab/page
- Visit TripAdvisor’s home page
- Locate and click the Sign In button
- Locate and click the Continue with Email button
- Read the provided authentication details
- Fill in the authentication details
- Check for Google Recaptcha and solve it if found. Otherwise, click the Log In button
- Locate and click the Hotels link
- Select London
- Extract the names, services, prices, and ratings & reviews of listed hotels
- Close Chrome while still holding the extracted data in memory (RAM)
- Save the listed hotels from memory to a json file and then a CSV file
With the above flow, I will be able to successfully scrape TripAdvisor. Let’s follow through while you open https://www.tripadvisor.com and developer tools in a guest browser window. Google Chrome is recommended but you could as well use Mozilla Firefox and other modern web browsers that have developer tools where you view HTML DOM tree. So you should have 3 things open, this article, your IDE, your web browser with TripAdvisor’s home page opened and its developer tools.
The flow above is what will make the scrapeTripAdvisor function in the funcs/scrape.js file, but first let’s input the TripAdvisor login credentials in our config.json file. You remember our config.json file is for saving info, preferences, and other variables that will be constant throughout the web bot’s running cycle? Excellent. So, we will open this file and write the TripAdvisor login credentials in there as a JSON string such that our config.json file looks like:
| {
“tripAdvisorEmail”: “bot-provided-email@mail.com”, “tripAdvisorPassword”: “trpAdvsrPss1234” } |
Feel free to prettify the JSON if your IDE supports it.
1. Launching Chrome and opening a new tab/page
First, we will be importing launchChrome from funcs/browser.js into funcs/scrape.js and then using them to ease things up. funcs/scrape.js would look like:
const scrapeTripAdvisor = async () => {
  // import launchChrome and newPage from the browser.js file in the same directory
  const { launchChrome } = require("./browser");

  const [newPage, exitChrome] = await launchChrome();
  const [page] = await newPage();
  if (!page) return;

  await exitChrome();
};

module.exports = scrapeTripAdvisor;
This is a really good interface to program our web crawler on – to bring to life our thoughts and imaginations.
2. Visiting TripAdvisor’s home page
Now, we use the page.goto function to visit urls. It takes two parameters, the first is the URL to visit and the second is an object specifying the options to use in determining when the url is considered opened. The object has only two options:
- timeout – the maximum amount of time (in milliseconds) to wait for the navigation. 0 disables timeout. The default is 30000 (30 seconds) but can be changed by the page.setDefaultTimeout and page.setDefaultNavigationTimeout methods.
- waitUntil – determines when the request has been processed and the Promise resolves. It must be any of load (which resolves when the load event has been fired), domcontentloaded (when domcontentloaded event has been fired), networkidle2 (when there are 2 or less running network connections for at least 0.5 seconds), and networkidle0 (when there are no more running connections for at least 0.5seconds). The default is load.
page.goto returns a Promise that gets resolved when the navigation to the url is considered successful depending on the waitUntil option passed.
We will be using only the waitUntil option and we will be setting it to networkidle0 so as to make sure the page.goto function resolves when all the network connections have been settled. We will not be using the timeout option right now.
So, our funcs/scrape.js file looks like:
const scrapeTripAdvisor = async () => {
  // import launchChrome and newPage from the browser.js file in the same directory
  const { launchChrome } = require("./browser");

  // Flow 1 => Launching chrome and opening a new tab/page
  const [newPage, exitChrome] = await launchChrome();
  const [page] = await newPage();

  // exit the function if the tab is not properly opened
  if (!page) return;

  // Flow 2 => Visiting TripAdvisor's home page
  const url = "https://www.tripadvisor.com/";
  console.log("Opening " + url);
  try {
    await page.goto(url, {
      waitUntil: "networkidle0", // wait till all network requests has been processed
    });
  } catch(e) {
    console.error("Unable to visit " + url, e);
    await exitChrome(); // close chrome on error
    return; // exiting the function
  }  await exitChrome(); // close chrome
};

module.exports = scrapeTripAdvisor;
3. Clicking an element in Puppeteer
The first thing when clicking a button is to know the CSS/JS selector of the button and then click the button by its selector.
- Knowing the selector of an element
To know the selector of an element, you should open the particular page where the element is in your own browser.
I assume you use a modern browser like Google Chrome, Firefox and the likes, if not please find out how to access the developer tools in your browser and how to inspect an HTML element in your browser.
So, right click on the element and click on Inspect, this opens developer tools and shows you the tag name and attributes of the HTML element; you can then use this to compute the selector of the element.
To verify you have gotten a valid selector of the element, use the Console tab of the developer tools to run:
document.querySelector("{THE SELECTED YOU CAME UP WITH}");If it returns the HTML element in question, you have gotten a valid selector. And if otherwise, you need to retry this process.
- Clicking an element by its selector
We will be looking at 3 ways by which we can do this
- Using the page.click function
page.click finds the element’s selector and scrolls it into view if out of view before clicking the element. It returns a Promise that either gets resolved as soon as the element has been clicked or throws an error if the element is not found in the DOM.
It accepts two parameters; the first is the element’s selector and the second is an object that specifies the click options:
-
- button – specifies the mouse button to use in clicking the element. It must be a string value of one of left, right, or middle. left means left click, middle means to click with the middle button and right means right click. The default is left
- clickCount – specifies the number of times to click the element. It must be a number. 2 means double click, 3 means triple click. The default is 1.
- delay – specifies the time (in milliseconds) to wait between mousedown and mouseup. It must be a number. 2000 means hold the mouse button down for 2 seconds. The default is 0.
const clickBtn = async () => {
  try {
    // the first element with btn in it class name
    const btnSelector = ".btn";

    // left clicks once
    await page.click(btnSelector);
    // right clicks once
    await page.click(btnSelector, { button: "right" });
    // double clicks with the left button
    await page.click(btnSelector, { clickCount: 2 });
    // double clicks with the right button
    await page.click(btnSelector, { button: "right", clickCount: 2 });


    // select the 7th element with btn in its class name
    const btn7Selector = ".btn:nth-of-type(7)";

    // left clicks
    await page.click(btn7Selector);
  } catch(e) {
    console.error("Unable to click button", e);
  }
};

clickBtn();- Using the page.waitForSelector and then click function
page.waitForSelector waits for an element to appear in the DOM. It returns a Promise that either gets resolved as (a clickable element’s handle) as soon as the element is found in the DOM or rejected if the element is not found.
It accepts two parameters. The first is the element’s selector and the second is an object that specifies the wait options:
-
- timeout – just like the page.goto timeout option. Except that you can change the default with just the page.setDefaultTimeout function and not page.setDefaultNavigationTimeout.
- visible – make it wait till the element is visible in the DOM i.e. it does not have any of the CSS display: none or visibility: hidden declaration. It must be boolean (true or false). The default is false.
- hidden – make it wait till the element is visible in the DOM i.e. it has either the CSS display: none or visibility: hidden declaration. It must be boolean (true or false). The default is false.
You then click the element when page.waitForSelector resolves. For example:
const clickBtn = async () => {
  const btnSelector = ".btn";
  try {
    const btn = await page.waitForSelector(btnSelector);
    await btn.click(); // left clicks once
    await btn.click({ button: "right" }); // right clicks once
    await btn.click({ clickCount: 2 }) // double clicks with left
  } catch(e) {
    console.error("Unable to click button", e);
  }
};

clickBtn();
Unlike page.click that attempts clicking an element right away, page.waitForSelector and then click will click the element right away if it is already in the DOM, and if not, it waits for the element to appear in the DOM for the timeout you set or the default timeout.
- Using the page.evaluate function
With page.evaluate, you can run a function on the page. It is like running a function in the Console.
It returns a Promise that resolves to what the function you passed returns or throws an error if any error occurs while trying to run the function in the page context.
const clickBtn = async () => {
  try {
    await page.evaluate(() => {
      const btnSelector = ".btn";
      const btn = document.querySelector(btnSelector);
      btn.focus();
      btn.click();
    });
  } catch(e) {
    console.error("Unable to click button", e);
  }
};
clickBtn();
A downside of page.evaluate() is that clicking is sort of restricted to using the left button, unlike the two other ways of clicking we examined above, so that you cannot double click, right click, and do some other types of clicks. But a good thing about this page.evaluate is you will be sure that the button gets clicked even if a modal is over it. Also, you can use it to easily click the nth type of your selector without using pseudo elements.
const clickBtn = async (nth = 0) => {
try {
await page.evaluate(() => {
const btnSelector = ".btn";
const btn = document.querySelectorAll(btnSelector)[nth];
btn.focus();
btn.click();
});
} catch(e) {
console.error("Unable to click button", e);
}
};clickBtn(0); // clicks the 1st occurence of the ".btn" selector
clickBtn(10); // clicks the 11th occurence of the ".btn" selector
clickBtn(2); // clicks the 3rd occurence of the ".btn" selector
It is better to prefer the second method ( page.waitForSelector and then click ) over the others because element might not be available and this method tries to wait some milliseconds for the element to appear in the DOM before clicking it. Another thing about this method is you can decide if you want to click the element only when it is visible or hidden.
You should use the first method ( page.click ) only when you are down-to-earth-sure the element is present on the page with the selector you had specified.
You should use page.evaluate for clicking only when you want to click the nth type of an element without having to use complex pseudo-classes .
Now, we can continue with making a TripAdvisor Scraper
4. Locating and clicking the Sign In button
Using the guide Knowing the selector of an element, you should come up with a[href*=”RegistrationController”] or something similar as the Sign In button selector.
Back on the Guest Browser, locate the Sign In button and Right click on it (to Open the context menu) and click on Inspect till the developer tools (like highlighted below) is opened.
From the highlighted html markup like in the developer tools, you would see how the selector a[href*=”RegistrationController”] was computed. Note that it was the span element that was highlighted at first. I then moved to the parentElement, an anchor (A) element which looks more stable than the span.
We should prefer the first method of Clicking an element by its selector – page.click here because the Sign In button becomes available as soon as the DOMContentLoaded event fires and from flow 2, we have waited for all network requests to be processed using the waitUntil: “networkidle0” option of the page.goto function.
So, the code to locate and click the Sign In button looks like the following:
const clickSignIn = async () => {
try {
await page.click('a[href*="RegistrationController"]');
} catch(e) {
console.error("Unable to click the sign in button", e);
}  try {
await page.waitForNavigation({ waitUntil: "networkidle0" });
} catch(e) {
// console.error("could not wait for navigation");
}
};
We have used page.waitForNavigation in the above code because after clicking the Sign In button on the TripAdvisor’s homepage, a loader appears on the screen. They mostly specify that some HTTP Requests are awaiting response, page.waitForNavigation waits for HTTP Requests to be processed. It returns a Promise that gets resolved when the HTTP Requests are processed and this depends on the waitUntil option. It accepts an object as a parameter. The object contains only two options just like the page.goto option.
5. Locate and click the Continue with Email button
Using the guide of knowing the selector of an element, a valid selector for the Continue with Email button is .regEmailContinue .
And here, let us use the second method of clicking an element by it’s selector – page.waitForSelector and then click.
Easily, our code looks like:
const clickContinueBtn = async () => {
try {
const continueBtn = await page.waitForSelector(".regEmailContinue");
await continueBtn.click();
} catch(e) {
console.error("Unable to click the Continue with Email button", e);
}
};clickContinueBtn();
6. Reading the provided authentication details
Remember we saved the authentication details in the config.json file? We will be using the Node.js require function to read the authentication details.
| const { tripAdvisorEmail, tripAdvisorPassword } = require(“../config”); |
That is how we read tripAdvisorEmail and tripAdvisorPassword into the memory from our config file.
7. Writing to an Input Field
There are 3 methods of writing to an input field.
- Using the page.type function
page.type accepts three parameters – the element’s selector, the text to be typed into the selected element, and an object of one option
delay – specifies the time to wait in milliseconds between pressing each keys
It returns a Promise that either gets resolved when the text has been typed into the element or throws an error if the element is not in the DOM.
const writeToInput = async () => {
try {
const inputSelector = "#input-field";
// type instantly
await page.type(inputSelector, "Good");
// type a bit slowly like a normal user that types fast
await page.type(inputSelector, "luck", { delay: 50 });
} catch(e) {
console.error("Unable to write to the input field", e);
}
};
writeToInput();
- Using the page.waitForSelector and then type into the element
page.waitForSelector waits for the element to be in the DOM and then returns a Promise that resolves to the element handle or throws an error if element is not found. You can use the timeout, visible, and hidden options as well
And when the element’s handle is returned, type into it.
const writeToInput = async () => {
try {
const inputSelector = "#input-field";
const input = await page.waitForSelector(inputSelector, { visible: true }); // write only if the input element is visible    // type Yes into the input field
await input.type("Yes");// highlight/select the content of the input field => "Yes"
await input.click({ clickCount: 3 });
// type No
await input.type("No");// "No" overwrites "Yes" because "Yes" was selected/highlighted using { clickCount: 3 } before typing "No"
} catch(e) {
console.error("Unable to write to input", e);
}
};
writeToInput();
- Using the page.evaluate function
With page.evaluate, you can pass a function that gets the element by its selector using document.getElementById, document.querySelector, and the likes. You then write into element by settings its value property to the text you want to type:
const writeToInput = async () => {
try {
await page.evaluate(() => {
const inputElement = document.querySelector("#input-field");
inputElement.value = "Goodluck!!!";
});
} catch(e) {
console.error("Unable to write to input", e);
}
};
writeToInput();
8. Filling in the authentication details
We want to write the tripAdvisorEmail and the tripAdvisorPassword into the email input field and the password input field respectively. I would be using the second method of Writing to an Input Field here.
const fillInAuthDetails = async () => {
try {
const emailField = await page.waitForSelector("#regSignIn.email");
await emailField.click({ clickCount: 3 });
await emailField.type(tripAdvisorEmail, { delay: 75 });
} catch(e) {
console.error("Unable to write to the email field", e);
}
try {
const passField = await page.waitForSelector("#regSignIn.password");
await passField.click({ clickCount: 3 });
await passField.type(tripAdvisorPassword, { delay: 75 });
} catch(e) {
console.error("Unable to write to the password field", e);
}
};
fillInAuthDetails();
9. Check for Google Recaptcha and solve it if found
Trip Advisor uses Google Recaptcha, but Google Recaptcha uses a kind of algorithm to determine whether to show the captcha or not. This is why you have to first check if Google Recaptcha is present
We use page.waitForSelector to check if an element is present on a page
const checkForGRecaptcha = async () => {
try {
const recaptchaSelector = ".recaptcha-checkbox"
await page.waitForSelector(recaptchaSelector);
console.log("Recaptcha found in page");
await solveCaptcha();
} catch(e) {
console.log("Google Recaptcha not found on the DOM");
// click the Log in button to continue
}
};
checkForGRecaptcha();
Feel free to use options on the waitForSelector for best specific finds
- Solving Captchas
There are third parties like 2Captcha, Anti Captcha, Death by Captcha. These third parties basically provide a way to send them the information of the captcha challenge you are being faced with and get a solution that can be used to bypass the captcha at an affordable rate. Rates vary by the type of captcha challenge you are trying to solve. They support many forms of captchas, not just Google Recaptcha. It seems like Google Recaptcha is the costliest.
All you need to be able to access their service is Sign up with them, get an API key, and fund your accounts so that the API keys are able to solve challenges. Solving challenges is as simple as sending HTTP Requests to certain API endpoints you will be provided with and getting the response.
We have used 2Captcha well and I trust their service, there is a certain endpoint for initiating a captcha solving task, this endpoint returns the task id which you will use in sending another HTTP request to another endpoint that gives you the captcha solution. For Google Recaptcha, you are required to wait for 20 seconds before calling the endpoint that returns the solutions or CAPTCHA_NOT_READY where you will have to wait for another couple of seconds (20) before calling the endpoint again.
You will need to create an account to get started. 2Captcha API Documentation is easy to understand and integrate.
You can use axios, request-promise, or some other Javascript module to make the HTTP requests to the API endpoints after installing them into your project.
The execution of the script needs to be paused till the captcha solution arrives. You can achieve this by creating a function that returns a Promise, such that the Promise resolves to the solution of the captcha when it arrives. Then you use the async/await syntax to pause execution until the function resolves.
See an example of how we use the axios module to initiate a captcha solving task, and then get the solution with 2Captcha and then wait for the solution below:
const axios = require("axios");

const { _2CaptchaAPIKey } = require("../config");

const initCaptchaSolvingTask = (siteKey, url) => {
return new Promise((resolve, reject) => {
const url = `https://2captcha.com/in.php?key=${_2CaptchaAPIKey}&method=userrecaptcha&googlekey=${siteKey}&pageurl=${url}invisible=1&soft_id=9120555`;
return axios
.get(url, { responseType: "text" })
.then(({ data }) => resolve(data))
.catch((e) => {
console.error("Unable to initiate captcha solving task", e);
reject(e);
});
});
};

let solveRetryTimes = 0;
const maxRetryTimes = 5;

const getCaptchaSolution = () => {
const url = `https://2captcha.com/res.php?key=${_2CaptchaAPIKey}&action=get&id=${initCaptcha}`;
const waitTime = 20000; // 20 seconds

return new Promise((resolve, reject) => {
setTimeout(() => {
axios
.get(url, { responseType: "text" })
.then(({ data }) => {
if (!data || /^CAPT?CHA_NOT_READY$/i.test(data)) {
console.error(`Captcha not yet solved => ${data}`);
if (solveRetryTimes > maxRetryTimes) {
reject(data);
return;
}
console.log("Retrying...");
solveRetryTimes++;
return getCaptchaSolution()
.then((solution) => resolve(solution))
.catch((e) => console.error(e));
}
console.log("Captcha solved " + data);
resolve(data);
})
.catch((e) => {
console.error("Error getting solved captcha", e);
if (solveRetryTimes > maxRetryTimes) {
reject(e);
return;
}
solveRetryTimes++;
return getCaptchaSolution()
.then((solution) => resolve(solution))
.catch((e) => console.error(e));
});
}, waitTime);
});
};
All you need to do is obtain the sitekey and other parameters. Refer to the 2Captcha API Documentation for the best approach on how to obtain it. You will be using the page.evaluate function to obtain the needed parameters.
The code then looks like:
const isOk = (val) => {
const isOk = val.indexOf("OK") === 0;
return isOk;
};const solveCaptcha = async () => {
try {
let initTaskId = await initCaptchaSolvingTask(siteKey, url);
console.log("2Captcha Task ID " + initTaskId);
if (!isOk(initTaskId)) return;// remove "OK|" at the start of the initTaskId
initTaskId = await initTaskId.substr(3);let captchaSolution = await getCaptchaSolution();
console.log("only a moment to go...");// remove "OK|" at the start of the captchaSolution
captchaSolution = await captchaSolution.substr(3);// 2Captcha provides you with a submit to use the captchaSolution and submit the form to sign in. Bear in mind that you will be using the page.evaluate function here

} catch(e) {
console.error("Unable to solve captcha and login", e);
}
};
Sign in is now successful. We could avoid signing in every time and start using the auto login feature by saving cookies, sessions, local and session storage, caches, and other application data to make things faster and feel more like a browser to the server. To do this, we will do the following:
- create a folder for the application data in our project directory, let’s name it chrome-data.
- be modifying our funcs/browser.js file by adding –user-data-dir which points to the chrome data directory.
const chromeDataDir = require("path").join(__dirname, "../chrome-data");
// `--user-data-dir=${chromeDataDir}`
// make sure chromeDataDir exists
(() => {
const { existsSync, mkdirSync } = require("fs");
if (!existsSync(chromeDataDir)) mkdirSync(chromeDataDir);
})();
If you are using Git versioning control be sure to put chrome-data/ on a new line in the .gitignore file for git to ignore our chrome-data directory. It’s personal though.
Our funcs/browser.js now looks like:
const launchChrome = async () => {
const puppeteer = require("puppeteer");  const chromeDataDir = require("path").join(__dirname, "../chrome-data");// make sure chromeDataDir exists
(() => {
const { existsSync, mkdirSync } = require("fs");
if (!existsSync(chromeDataDir)) mkdirSync(chromeDataDir);
})();const args = [
"--disable-dev-shm-usage",
"--no-sandbox",
"--disable-setuid-sandbox",
"--disable-accelerated-2d-canvas",
"--disable-gpu",
"--lang=en-US,en",
`--user-data-dir=${chromeDataDir}`
];  let chrome;
try {
chrome = await puppeteer.launch({
headless: true, // run in headless mode
devtools: false, // disable dev tools
ignoreHTTPSErrors: true, // ignore https error
args,
ignoreDefaultArgs: ["--disable-extensions"],
});
} catch(e) {
console.error("Unable to launch chrome", e);
// return two functions to silent errors
return [() => {}, () => {}];
}const exitChrome = async () => {
if (!chrome) return;
try {
await chrome.close();
} catch(e) {}
}const newPage = async () => {
try {
const page = await chrome.newPage();
const closePage = async () => {
if (!page) return;
try {
await page.close();
} catch(e) {}
}
return [page, closePage];
} catch(e) {
console.error("Unable to create a new page");
return [];
}
};

return [newPage, exitChrome];
};

module.exports = { launchChrome };
We can then continue to extract London Hotels from TripAdvisor.
10. Locate and Click the Hotels Link
From the guide of Knowing the selector of an element, a good selector for the Hotels link would be a[href^=”/Hotels”] from the below screenshot:
Another good selector is a[title*=”Hotels”] but the title attribute is more likely to change. But href would last longer than title attr. in the sense that href leads to a valid resource on the server unless it is a dummy link.
Going with a[href^=”/Hotels”] , we should still verify that the selector is well computed by typing document.querySelector(‘a[href^=”/Hotels”]’) in the console followed by the Enter/Return key. We do this by switching to the Console tab in the developer’s tools like below: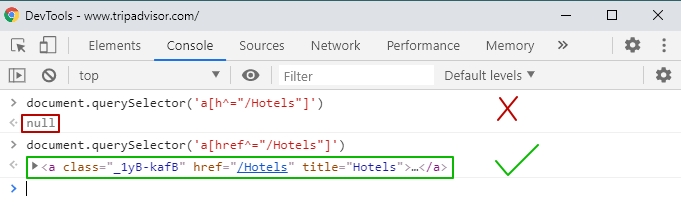
If the selector is not valid, null is returned in the console. Otherwise, an html markup of the element is returned.
Then, we click using page.evaluate and the click like. We use this because after carefully examining TripAdvisor, a modal might be on this link.
const clickingHotelsLink = async () => {
try {
await page.click('a[href^="/Hotels"]');
} catch(e) {
console.error("Unable to click the hotels link", e);
}
};
clickingHotelsLink();
After clicking on Hotels, an input element with the title Where to? get focused on. So, we want to type “London” into it. It is good to always wait a few seconds when typing into an input element that autofocuses on page load
const pageType = async (txt) => {
try {    await page.waitFor(2500); // wait a bit before typing
await page.keyboard.type(txt);
} catch(e) {
console.error(`Unable to type ${txt}`, e);
}
};
pageType("London");
// we made pageType re-usable by making it type the first argument passed to it
After this we want to click on London (England, United Kingdom) the first result whose selector is form[action=”/Search”] a[href*=”London”] . We do that with page.waitForSelector and then click because it might take a few seconds for the search result to appear.
const clickSearchResult = async (n) => {
try {
const firstResult = await page.waitForSelector(`form[action="/Search"] a[href*="London"]:nth-of-type(${n})`);
await firstResult.click();
try {
await page.waitForNavigation({ waitUntil: "networkidle0" });
} catch(e) {}
} catch(e) {    console.error(`Unable to click result ${n}`);
}
};
clickSearchResult(1);
Now, we can use page.evaluate to extract the names, services, prices, and ratings & reviews of listed hotels.
page.evaluate is just like the browser’s console. You can run Javascript codes inside it and have it return what you need. We will harness this to get the names, prices, and ratings and reviews of the listed hotels.
There are 31 hotels listings on the page. We will need the most common selector of the listings. Use the mouse icon highlighted below by clicking on it and the element you want to select. Check the parentElement and ancestors till the nextElement points to another listing.
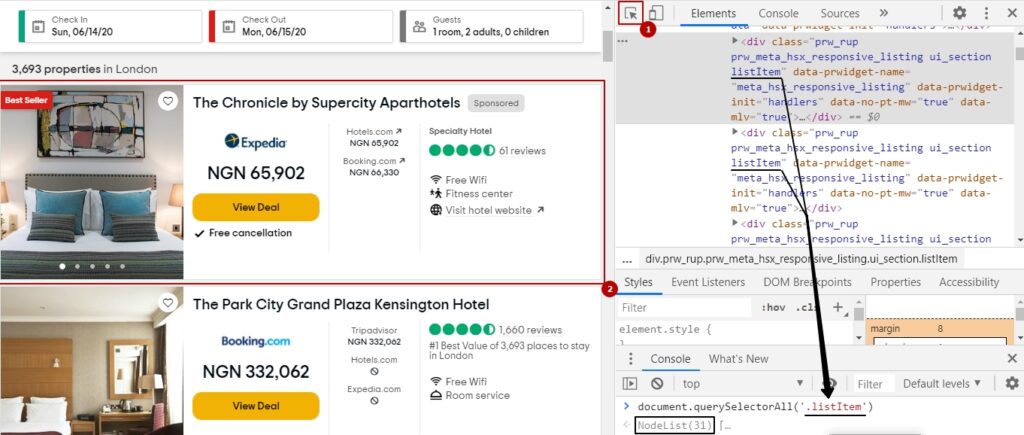
We will be using .listItem as the selector of each listing because it is common and there are 31 of them.
We then extract the listings like below:
const extractHotelsInfo = async () => {
try {
const hotelsInfo = await page.evaluate(() => {
let extractedListings = [];
const listings = document.querySelectorAll(".listItem");
const listingsLen = listings.length;      for (let i = 0; i < listingsLen; i++) {
try {
const listing = listings[i];
const name = listing.querySelector(".listing_title a").innerText;
const services = (listing.querySelector('.icons_list').innerText || "").replace("\n", ", ");
const price = listing.querySelector(".price").innerText;
const ratings = listing.querySelector('.ui_bubble_rating').getAttribute('alt');
const reviews = listing.querySelector(".review_count").innerText;extractedListings.push({ name, services, price, ratings, reviews });
} catch (e) {}
}return extractedListings;
});    // do anything with hotelsInfo    console.log("Hotels Info", hotelsInfo);
} catch(e) {
console.error("Unable to extract hotels listings", e);
}
};
extractHotelsInfo();
11. Exiting Chrome
We are now done with the scraping. We simply invoke exitChrome to shut the browser down.
| exitChrome(); |
We need to exit Chrome or the process will not stop unless it crashes.
12. Saving the listed hotels from memory
There are different ways and formats to save the extracted data. But we will be exploring 2 popular options. It is good to create a folder for the extracted data. Let’s create extracted-data in our project directory and we shall be saving the extracted data there. This makes our project more structured and organized
- Saving to JSON files
We will be using the inbuilt fs module of Node.js to write to files. And we need to use the JSON.stringify function to convert our Javascript objects into a JSON string. We then write the JSON string to our (.json) file
const saveAsJson = (data) => {
const fileName = "extracted-data/hotels.json";
const data = JSON.stringify(data);  const { writeFile } = require("fs");
return writeFile(fileName, data, (err) => {
if (err) return console.error("Unable to save json to file");
console.log("Data successfully saved to file in json");
});
};
saveAsJson(hotelsInfo);
- Saving to CSV files
CSV is a nice format to present extracted data to users because the files can be opened with Spreadsheet viewing and/or editing softwares like Microsoft Excel, Google Spreadsheet and the likes. Unlike JSON which is more friendly to developers than to common users.
There are various Javascript modules to use in writing to JSON files. Anyone could come up with a new one at any time and host it on NPM. But we will be using the objects-to-csv module to do this. This module makes writing Javascript objects to CSV a lot easier:
const saveAsCsv = async (data) => {
const fileName = "extracted-data/hotels.csv";  const ObjectsToCsv = require("objects-to-csv");
const csv = new ObjectsToCsv(data);
try {
await csv.toDisk(fileName);
console.log("Data successfully saved to file in CSV");
} catch(e) {
console.error("Unable to save csv to file", e);
}
};
saveAsCsv();
The objects-to-csv module needs to be installed. You can install it by running npm install –save objects-to-csv on the terminal.
13. Finishing up
We edit our index.js file so that it runs the scrapeTripAdvisor function after importing it from funcs/scrape.js. Then, our index.js file looks like:
const scrapeTripAdvisor = require("./funcs/scrape");
scrapeTripAdvisor();
We then edit the “script” section of our package.json file to have “start” point to index.js . Remove “test” unless you have set up tests for this project. package.json should look like:
| “scripts”: { “start”: “node index” } |
VI. Running the Scraper
Running the scraper is as easy as navigating to your project directory from the terminal and running npm start . npm start runs node index – the command we specify in the script section of package.json
You could as well run node index directly in a terminal/console.
VII. Numerical Results
| Chromium headless instance* | HTTP requests | |
| Setup time, ms | 45000 | 5 |
| Log-in time, ms | 105000 | 13 |
| 1 page load time, ms | 6 | 10 |
*based on TripAdvisor scrape
Regular scraping without launching a Chromium instance seems slower to scrape the pages because it mostly involves making HTTP requests that download the whole HTML document. While headless scraping could make just AJAX (XmlHttp) requests to the server to get just the needed data (hotels in this context) without having to download other unnecessary data.
The scraper ran for approx. 3 mins. To scrape 30 hotel listings from the first page of TripAdvisor London hotels listings, it took approx. 3.55 mins and 193MB of RAM on my local computer with (4.00GB of RAM and 1.30GHz CPU).
While for scraping the same amount of data, it ran for approx. 2.36 mins and 225MB of RAM on a remote server (4.00GB of RAM and 2.40GHz CPU). Particular results depend on the available CPU, memory, and network speed.
Avg. time to launch the headless Chrome instance and sign in is 2.50 mins, and the average scraping speed to scrape the 30 hotel listings off each page is approx. 1 page / 6 ms.
While a regular scraping without launching a headless browser would take an average of 18 ms to sign in, and the average speed would be 1 page / 10 ms.
VIII. Conclusion
You can always refer to this scraping guide when having any difficulties in a scraping process. If things get too complicated, you can run the browser with headless: false to ease things up because you will be able to see what is going on and debugging will be easier. Be prepared to use proxies to hide your public IP, rotating proxies will be needed if the target website bans IP Address. Having mastered these techniques you will be able to approach any kind of web scraping the modern and smart way.
You can clone this example TripAdvisor project code from GitHub . And you can download it as zip. Be sure to download the dependencies by running npm install before running the scraper with npm start.