Today we are going to discuss the quite huge and engaging theme – REST API – and make our own web application based on the most popular Java framework – Spring. To start with, we will explain the two main concepts of this article – REST API and Spring. Note, these two concepts are quite complex, and, unfortunately, we can’t fully describe them, but in the article you will find links that will help you cope with moments where you might get stuck.
What is a REST?
In this post we have already considered extracting data from the site with API. Now let’s take a look at how it works without programming. We are going to visit Linus Torvalds’ page on the GitHub. Simple page will be shown:
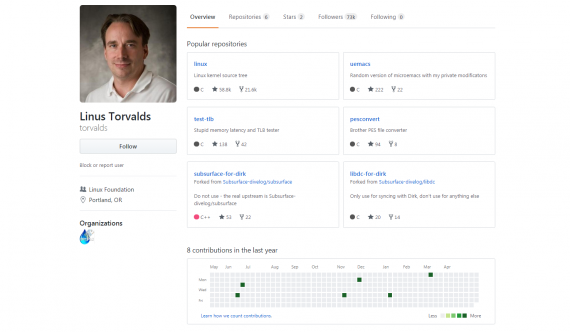
But what would be shown if we address the API to see this page?
{
  "login": "torvalds",
  "id": 1024025,
  "avatar_url": "https://avatars0.githubusercontent.com/u/1024025?v=4",
  "gravatar_id": "",
  "url": "https://api.github.com/users/torvalds",
  "html_url": "https://github.com/torvalds",
  "followers_url": "https://api.github.com/users/torvalds/followers",
  "following_url": "https://api.github.com/users/torvalds/following{/other_user}",
  "gists_url": "https://api.github.com/users/torvalds/gists{/gist_id}",
  "starred_url": "https://api.github.com/users/torvalds/starred{/owner}{/repo}",
  "subscriptions_url": "https://api.github.com/users/torvalds/subscriptions",
  "organizations_url": "https://api.github.com/users/torvalds/orgs",
  "repos_url": "https://api.github.com/users/torvalds/repos",
  "events_url": "https://api.github.com/users/torvalds/events{/privacy}",
  "received_events_url": "https://api.github.com/users/torvalds/received_events",
  "type": "User",
  "site_admin": false,
  "name": "Linus Torvalds",
  "company": "Linux Foundation",
  "blog": "",
  "location": "Portland, OR",
  "email": null,
  "hireable": null,
  "bio": null,
  "public_repos": 6,
  "public_gists": 0,
  "followers": 73007,
  "following": 0,
  "created_at": "2011-09-03T15:26:22Z",
  "updated_at": "2017-11-14T16:54:03Z"
}
The same data in JSON format. As you can see, it’s more convenient to get data from API than by parsing the whole web page.
So, API is the technology, which returns JSON. To create your own API, first of all you need to purchase Web Service – technology which provides access to the resources data. Today we are going to build API with WS-REST or simply REST.
REpresentational State Transfer is an architectural style that makes it easier for different applications to communicate with each other by creating their own API. In fact, there are two main roles – server and client. Server is an app where data are placed, and client is the app to receive JSON-data from server. Furthermore, creating REST API is the easiest way to provide access to our data for other apps.
Why Spring?
To begin with, let’s gain a basic understanding of what Spring is. It’s a huge framework with a lot of modules that were created to make java developers’ life easier – with the appearance of Spring, creating web apps and Big Data projects became faster. A more detailed reading about Spring is available on the official site.
Why Spring? Answer #1: Spring and Java developing largely are considered old technologies by a lot of programmers. Honestly, partly it’s true, because there are a lot of different, much easier approaches and technologies that can solve problems which are solved with Spring and Java. However, Spring was integrated into a lot of large and small projects which need to be supported, and Java is still the most popular language.
Why Spring? Answer #2: As was mentioned above, there are easier languages and frameworks as far as understanding and usage go than Spring and Java, but isn’t it engaging to study something complex and unusual? Also, studying new technologies is very helpful in sharpening your program skills.
Creating REST API
Now we know some basics about building API and Spring, but practice is the best teacher! Let’s start creating a project and build our awesome API.
What do we need to create and test it?
We will create a simple REST API which will return JSON-format data about employees. Everyone who has access to our API will be able to create new employees, update, delete, search by name and salary.
Open Intelij IDEA and let’s see what we have there.
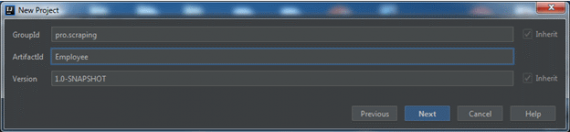
Press the Create button. In the left column choose Maven project.

Press “next”. GroupId field is a unique organizational name, so you can enter it, or your reverse domain name (scraping.pro => pro.scraping), but as we are doing this project for fun, you can enter an imaginary domain name.
Main class
To launch our project, we need to create the main class (Main.java).
package pro.scraping;

import org.springframework.boot.SpringApplication;
import org.springframework.boot.autoconfigure.SpringBootApplication;


@SpringBootApplication
public class Main {
    public static void main(String[] args) {
        SpringApplication.run(Main.class, args);
    }
}
From this class we will launch the whole project. Annotation @SpringBootApplication allows us to make launching more convenient. Create resources/application.properties file and enter the following to make connection to the DB:
//enter the connection follow this pattern jdbc:mysql://localhost:3306/employee_db
spring.datasource.url=  jdbc:mysql://localhost:3306/employee_db

// username
spring.datasource.username= root
//password
spring.datasource.password=xxxx

// port where our server will be listened
server.port = 8090
Good, the project is created and configured, what’s next? Open pom.xml file. This file is the main one in a Maven project where all dependencies which will be used in our project are situated. Dependencies are like 3rd party libraries to use some feature that are not integrated in project or in Java. The whole list of dependencies is placed below:
<groupId>pro.scraping</groupId>
    <artifactId>Employee</artifactId>
    <version>1.0-SNAPSHOT</version>
    <parent>
        <groupId>org.springframework.boot</groupId>
        <artifactId>spring-boot-starter-parent</artifactId>
        <version>1.5.9.RELEASE</version>
    </parent>

    <dependencies>
        <!-- Spring boot dependency -->
        <dependency>
            <groupId>org.springframework.boot</groupId>
            <artifactId>spring-boot-starter-web</artifactId>
        </dependency>
        <!-- JPA Data (We are going to use Repositories, Entities, Hibernate, etc...) -->
        <dependency>
            <groupId>org.springframework.boot</groupId>
            <artifactId>spring-boot-starter-data-jpa</artifactId>
        </dependency>
        <!-- Use MySQL Connector-J -->
        <dependency>
            <groupId>mysql</groupId>
            <artifactId>mysql-connector-java</artifactId>
        </dependency>
    </dependencies>

    <properties>
        <java.version>1.7</java.version>
    </properties>
    <build>
        <plugins>
            <plugin>
                <groupId>org.springframework.boot</groupId>
                <artifactId>spring-boot-maven-plugin</artifactId>
            </plugin>
        </plugins>
    </build>
As you can see, Maven dependencies are very simple – for example, mysql dependency connects the MySQL database, or spring dependency is used to integrate Spring framework to the project.
Db table and entity
Before we start creating our classes and methods, we will create a table. There will be only one – “employee”:
CREATE TABLE employee (
  id INT(6) UNSIGNED AUTO_INCREMENT PRIMARY KEY,
  name VARCHAR(25),
  salary INT
);
To make connection between our DB and project we need to create an entity. Here Spring Data JPA will help us. Create class Employee in entity package:
package pro.scraping.entity;

import javax.persistence.Entity;
import javax.persistence.GeneratedValue;
import javax.persistence.GenerationType;
import javax.persistence.Id;

@Entity
public class Employee {
    @Id
    @GeneratedValue(strategy = GenerationType.AUTO)
    private int id;
    private String name;
    private int salary;
    public Employee() {}
    public Employee(String name, int salary) {
        this.name = name;
        this.salary = salary;
    }
    public Employee(int id, String name, int salary) {
        this.id = id;
        this.name = name;
        this.salary = salary;
    }
    public int getId() {
        return id;
    }
    public void setId(int id) {
        this.id = id;
    }
    public String getName() {
        return name;
    }
    public void setName(String name) {
        this.name = name;
    }
    public int getSalary() {
        return salary;
    }
    public void setSalary(int salary) {
        this.salary = salary;
    }
    @Override
    public String toString() {
        return "Employee{" +
                "id=" + id +
                ", name='" + name + '\'' +
                ", salary=" + salary +
                '}';
    }
}
It consists of fields that are the same as the table’s fields, getters, setters and constructors. Empty constructor is a must-have of every entity class.
Repository
Ok, we have an entity, but how should we access the data from DB? The answer is a repository. It’s an interface with a list of methods that we don’t need to realize. File repository/Employee.java :
package pro.scraping.repository;

import org.springframework.data.jpa.repository.JpaRepository;
import org.springframework.stereotype.Repository;
import pro.scraping.entity.Employee;
import java.util.List;

// points, that interface is using for operation with DB's data
@Repository

// JpaRepository allows to acces to DB by many useful methods
public interface EmployeeRepository extends JpaRepository<Employee, Integer> {
  // custom methods
    List <Employee> findByName(String name);
    List <Employee> findAllBySalaryBetween(int min, int max);
}
JpaRepository consists of all basic methods to access DB. But what should we do if it’s necessary to find all employees by salary? Let’s try to talk with Spring with its language!
For example, you want to find all employees with salary between 1000 and 2000.
Firstly, we need to get all employees. So, it’s necessary to use List:
List <Employee>…
…And find all of them…
List <Employee> findAll
The main field in this query is salary. Smart Intelij IDEA prompts us some variants.

And with these prompts we have created our own query without SQL! Other methods such as save(), findOne()… don’t need to be mentioned in the interface.
Controller
The next step is REST controller creating. There our routes will be situated. File controller/Employee.java :
package pro.scraping.controller;
import org.springframework.beans.factory.annotation.Autowired;
import org.springframework.web.bind.annotation.*;
import pro.scraping.entity.Employee;
import pro.scraping.repository.EmployeeRepository;
import java.util.List;
import java.util.Map;
@RestController // Annotation tells complier that this controller is for API
public class EmployeeController {
// Connecting the bean
@Autowired
EmployeeRepository er;
// Routes definition. For example, here is the route "/employee" which will work only
@GetMapping("/employee") by GET method
public List<Employee> index() {
return er.findAll();
}
@GetMapping("/employee/{id}")
public Employee view(@PathVariable String id){
int employeeId = Integer.parseInt(id);
return er.getOne(employeeId);
}
@PostMapping("/employee")
public Employee create(@RequestBody Map<String, String> body){ // @RequestBody allows to get params from request
String name = body.get("name");
int salary = Integer.parseInt(body.get("salary"));
return er.save(new Employee(name, salary));
}
@PutMapping("/employee/{id}")
public Employee update(@PathVariable String id, @RequestBody Map<String, String> body){
int employeeId = Integer.parseInt(id);
Employee employee = er.findOne(employeeId);
employee.setName(body.get("name"));
employee.setSalary(Integer.parseInt(body.get("salary")));
return er.save(employee);
}
@DeleteMapping("/employee/{id}")
public boolean delete(@PathVariable String id){
int employeeId = Integer.parseInt(id);
er.delete(employeeId);
return true;
}
@PostMapping("/employee/search")
public List<Employee> search(@RequestBody Map<String, String> body) {
String name = body.get("name");
return er.findByName(name);
}
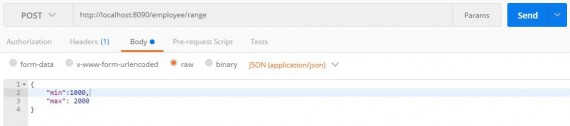
@PostMapping("/employee/range")
public List<Employee> findRange(@RequestBody Map<String, String> body){
int min = Integer.parseInt(body.get("min"));
int max = Integer.parseInt(body.get("max"));
return er.findAllBySalaryBetween(min,max);
}
}
Testing the app
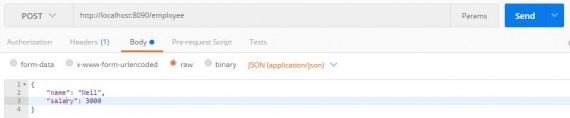
All actions with data are managed by EmployeeRepository instance. Now let’s see the results of some routes. To test it, we will use the Postman.
Let’s add a record to our table.
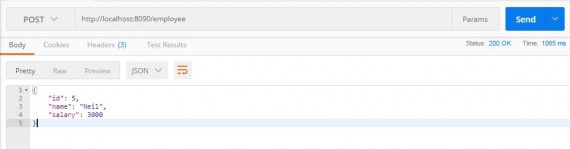
 And here is the successful adding
And that’s how we find the employees’ salaries from 1000 to 2000.
Enter…
…Getting

Try to test other routes by yourself.
What’s next?
Creating API is only the first step on the way to creating awesome projects . Hereafter, you can create clients that will be able to work with your server – messenger bot, mobile app or website can use this functionality. The main advantage – it doesn’t matter what technology was used on the client side. For example, we have a Telegram bot made on Node.js. If the bot is able to receive JSON, it can work with our server, and your subscribers will receive notifications about, for example, new employees in your company.
P.S. And here is the source code of the project.